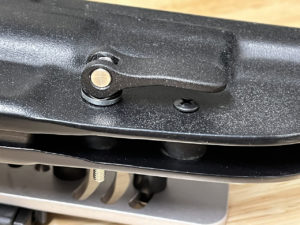
Note to recent changes in manufacturing, you may receive one of two types of levers. The new type contains a fiber-reinforced washer where the older style has a polymer washer with a metal backing. There is no rubber o-ring in the older style.
Package contents:
- (1) Quick-Lock Holster Lever (bolt attached)
- (1) Cam washer
- (1) Rubber o-ring (shipped after December 2024)
Installation:
- Be certain that your existing holster uses #8-32 screws before proceeding. Failure to use the correct size will result in your holster screw and/or Quick-Lock Holster Lever being damaged.
- Remove the existing top screw from your holster.
- Slide the o-ring up against the cam washer. Ensure that the washer’s radius cut outs are flat against the round portion of the lever.
- Thread in the lever into your existing holster screw until tight.
- Cut off excess bolt (if desired, this is optional if you are using drop/offset such as a BOSS hanger)
- Add thread-locker (optional)
Testing:
- When testing the fit with your handgun, tighten the cam to your desired tightness. Keep in mind that the force necessary to remove the gun from the holster will be less when it’s on your belt.
- Don’t use cut off the bolt or apply thread-locker on the bolt until you are satisfied with the fit.
